Recording Tests
Screenster uses a record-playback-verification algorithm for codeless automation of UI testing. This section offers an in-depth guide to test recording, editing, and maintenance.
Recording tests
Start with signing in to your Screenster account. Once logged in, you can proceed to recording your UI test. To make it a little more interesting, let’s record a smoke test for Wikipedia.
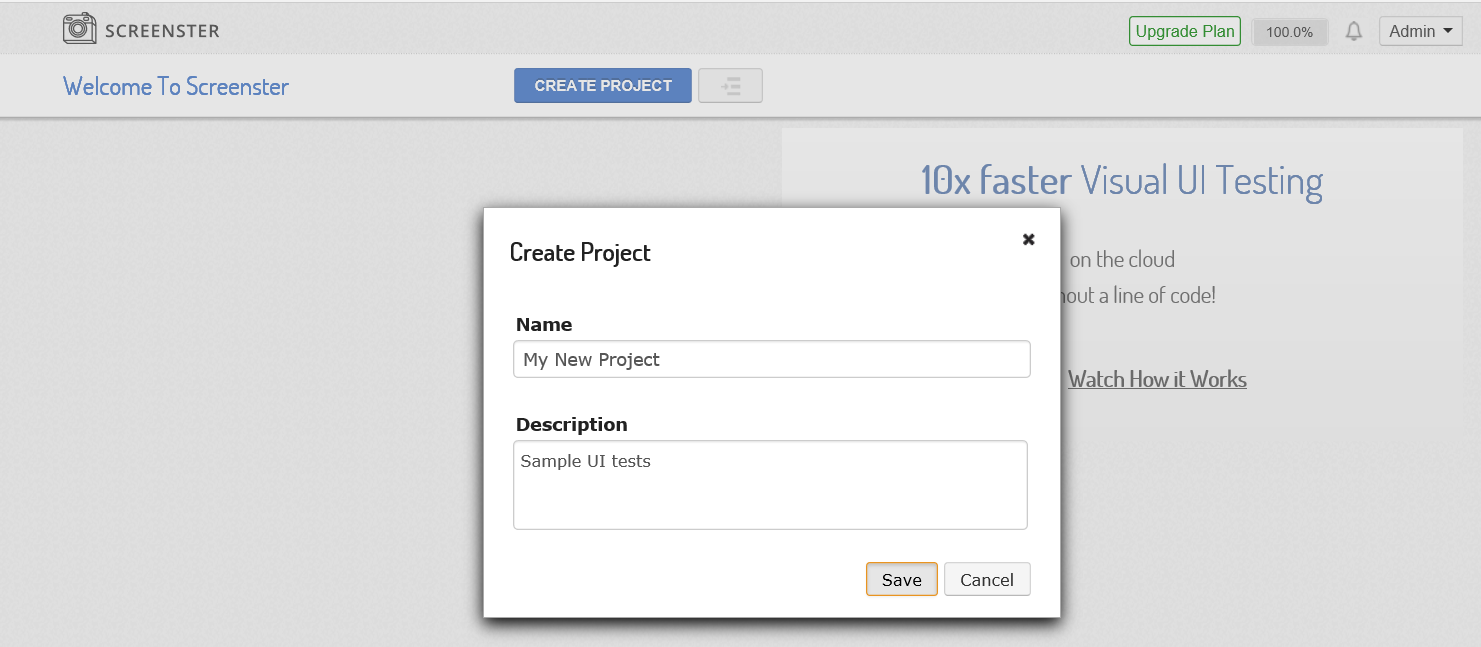
Click Create Project in your Screenster dashboard in the top menu.

You will see a popup suggesting you to name your project and add a description. Once you’re through with this, click Save.
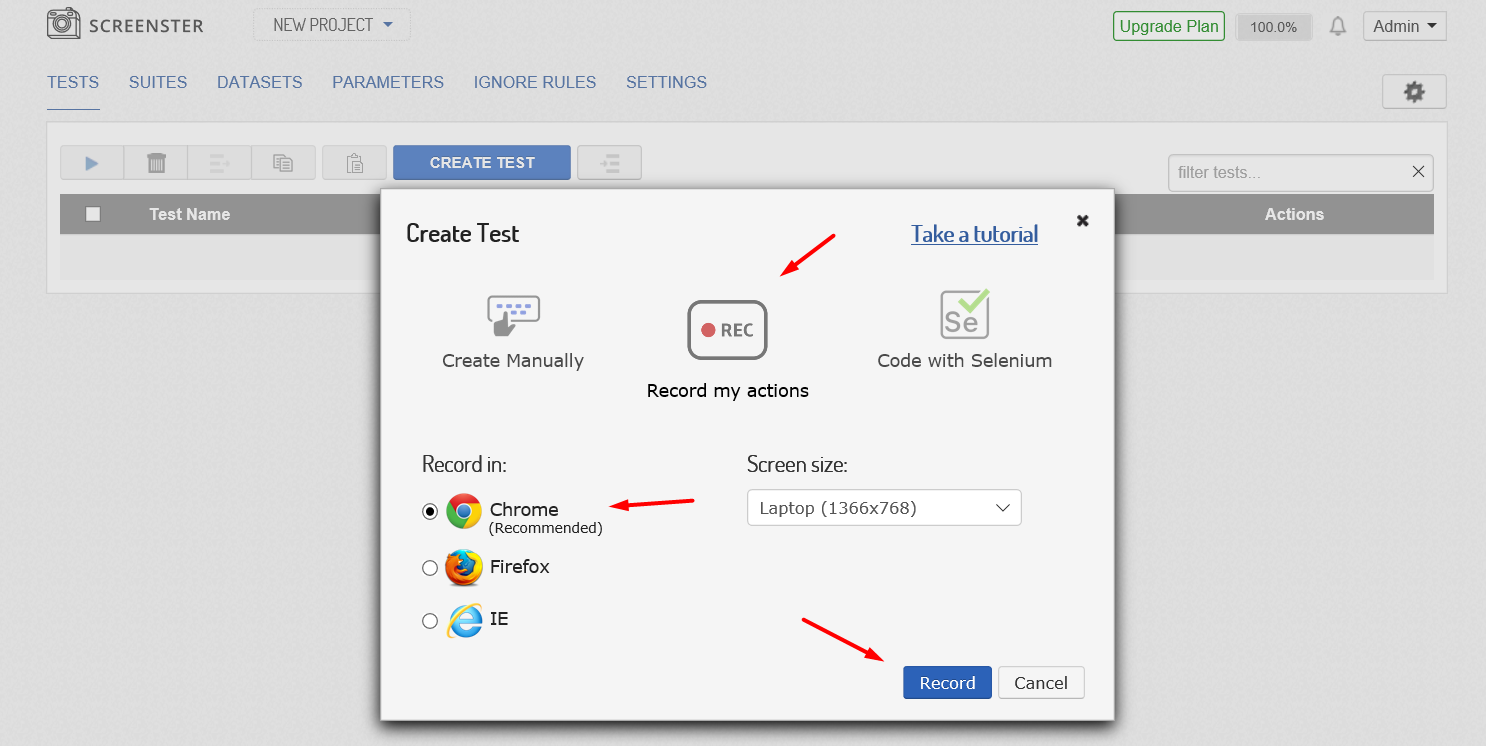
After saving your project details, you will find yourself on the project page. Click on Create Test and select the Record option. You will see a pop-up prompt asking you to specify screen resolution and select a browser. For this test, we will choose 1366×768 and Chrome. Later on, you will be able to rerun the same test in any browser.
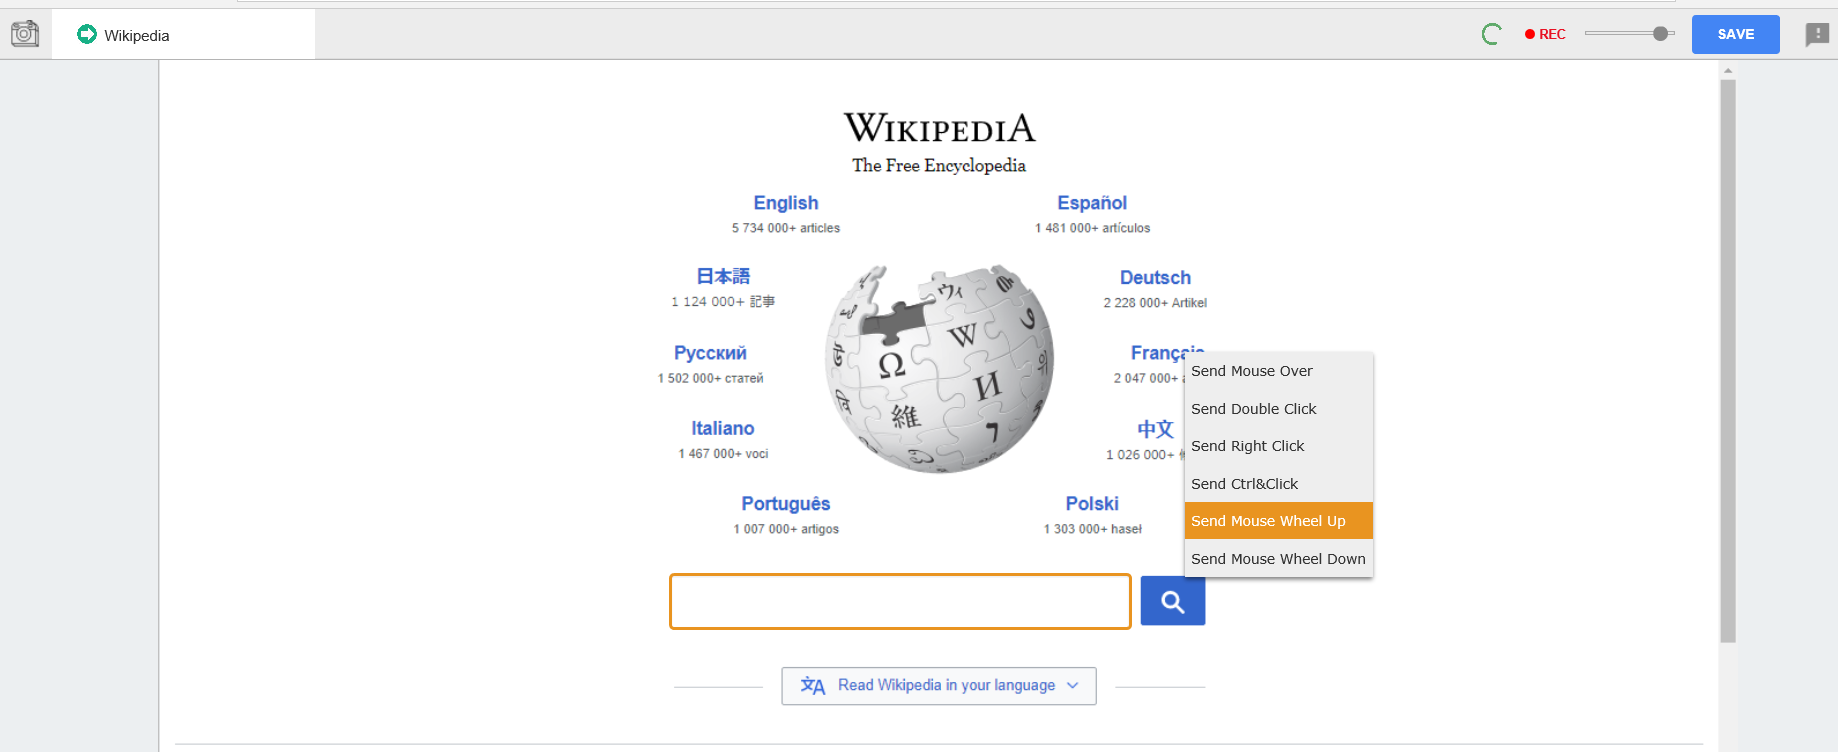
You will see a blank browser page open inside of the Screenster web app. In the address bar of the browser, specify the URL of the page that you’ll be testing. Let’s take the main page of Wikipedia (http://en.wikipedia.org) for this test.
Once the page renders, type some keyword into the Wikipedia search bar and press Enter. Wikipedia will redirect you to an appropriate page. You can click on buttons and links, scroll up and down using PgUp, PgDn, Home and End keys, and perform other actions you’d do in a regular web browser. If you right-click on some element on the recording screen, a number of extra options will appear:
Click the Save Test button in the upper right corner. Screenster will save the baselines for the pages you’ve visited, and it will also suggest extracting test parameters, including the base URL and the keyboard input:
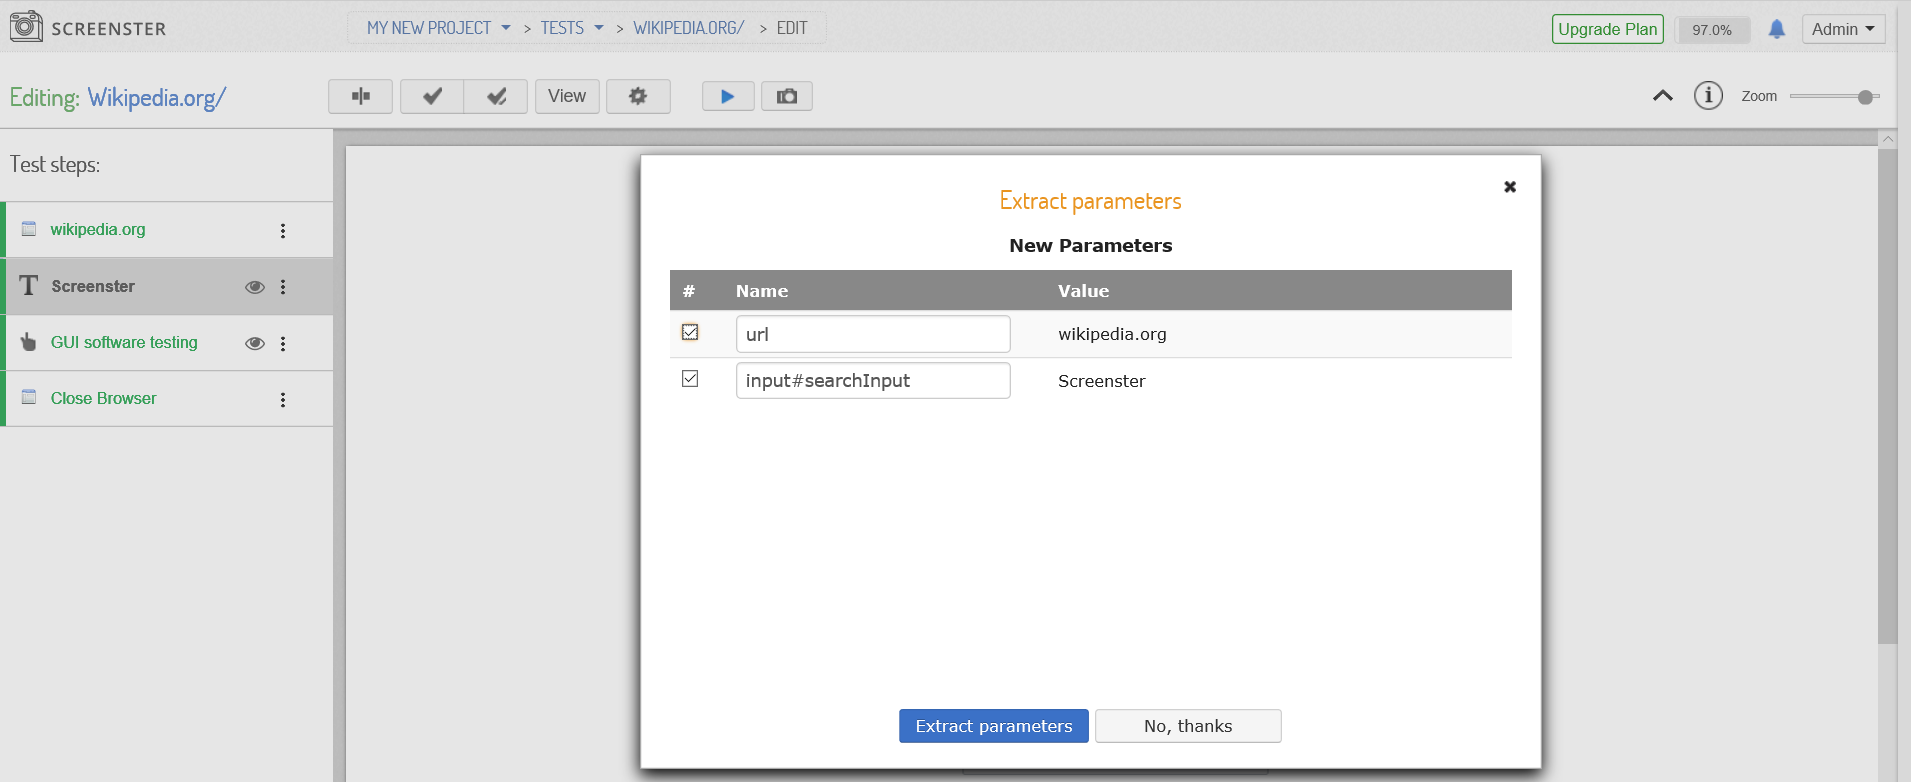
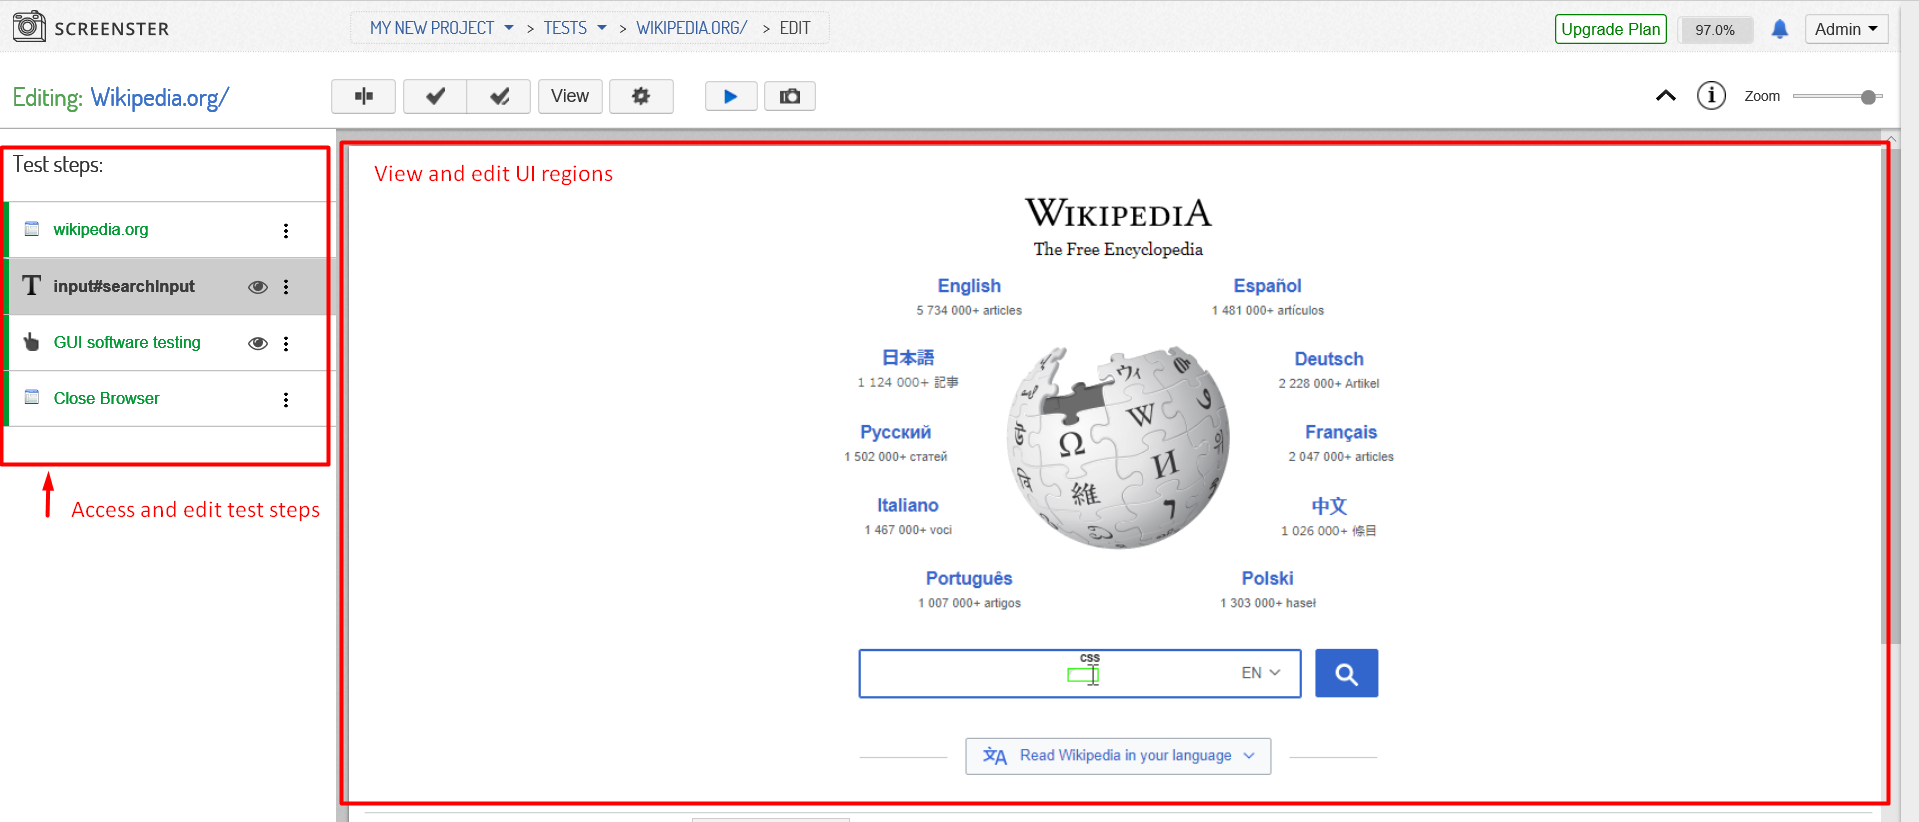
After you’ve extracted the parameters, Screenster will take you to your test menu, allowing you to access test steps and view and edit UI regions.
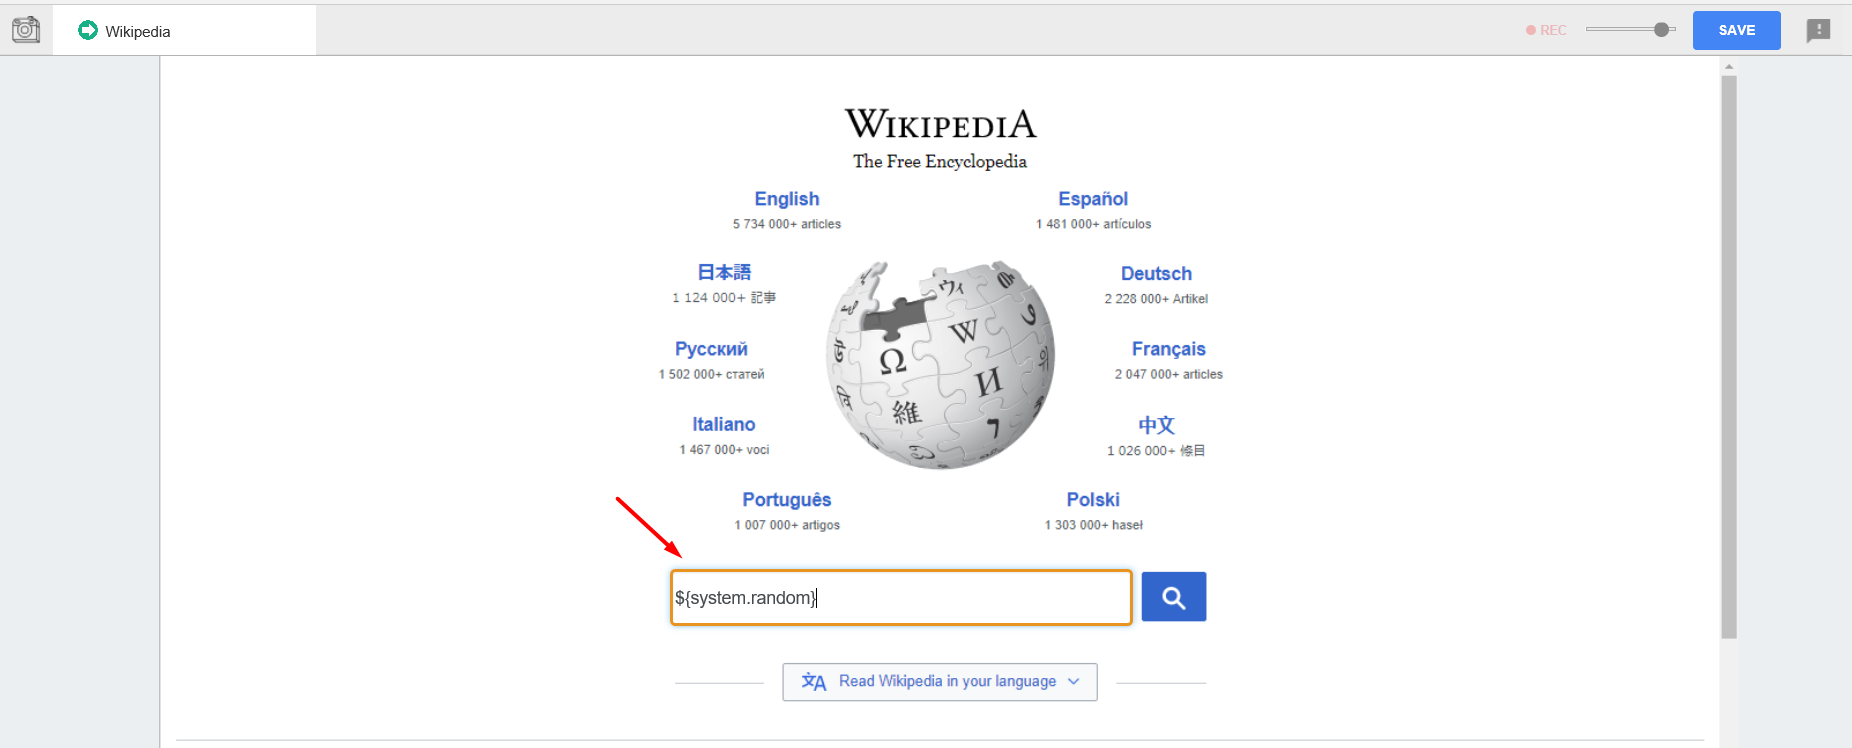
Tip: sometimes it may be useful for you to randomize your text input (e.g. when creating a registration scenario when you’ll need different login for each run of the test). Here are a few options to do that with Screenster:
- Type ‘${system.time}’ to get current time typed as a result
- Type ‘${system.date}’ to get current date typed as a result
- Type ‘${system.random}’ to get a random value typed as a result
You can also visit the Release History page to check what’s new and what has been improved in your current Screenster version.