Adding and Deleting Steps
Adding a new test step
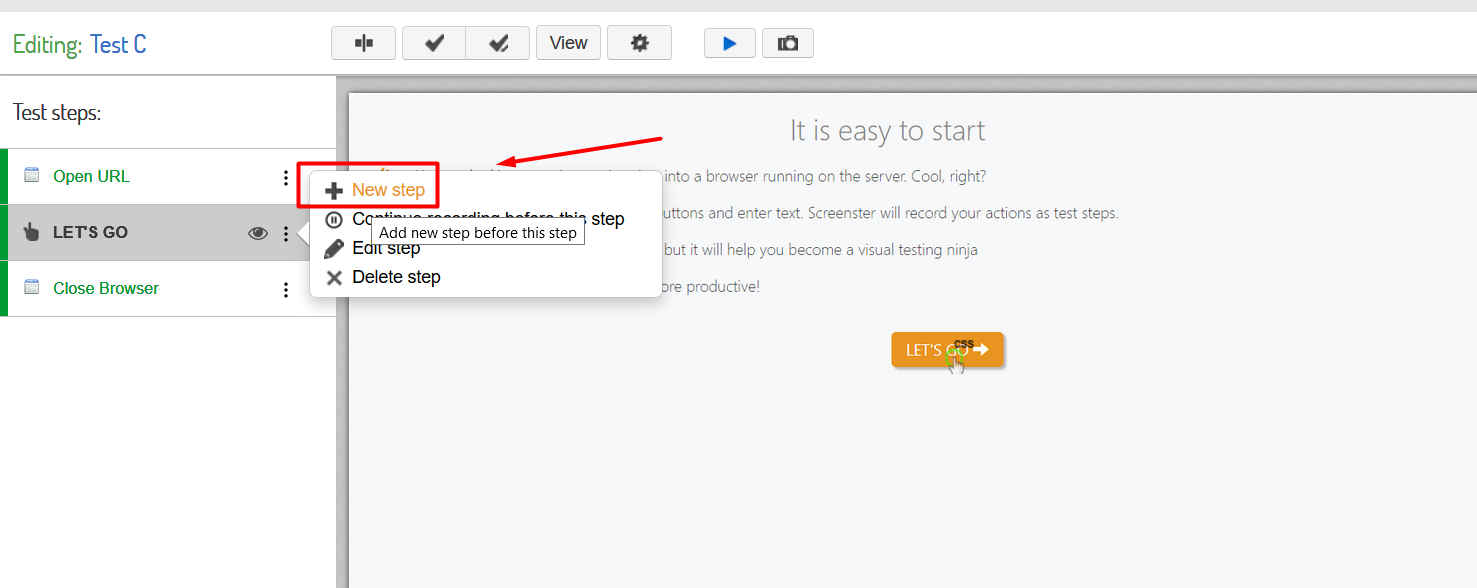
In order to add a new step, hover over the three dots icon located to the right on every test step. Select New Step in the popup menu that appears on hover.
The new step will be added before the existing one. You will need to manually specify the parameters for the new step before saving it.
First of all, you need to specify the type of the action, by selecting the action type from the drop-down. The default action type is “Click command” which stands for clicking on an element on the page. Another important parameter that you need to specify is the “CSS selector”. It is impossible to save a new step without specifying which element it will interact with.
Specifying a selector manually requires the knowledge of CSS selectors, so it is sometimes easier to add a new step after selecting the target element first. To do this, select a required element, make sure it is actually highlighted, and click on the “Add new step for this element” option in the menu above which appears after successful selection.

Deleting test steps
To delete a step, hover over its step menu (the icon with the three dots located to the right), then select Delete Step in the popup that appears on hover. Please take caution when doing this: deleting is easy but your flow will probably change and errors might result on replay.
You can also visit the Release History page to check what’s new and what has been improved in your current Screenster version.