Continue Recording
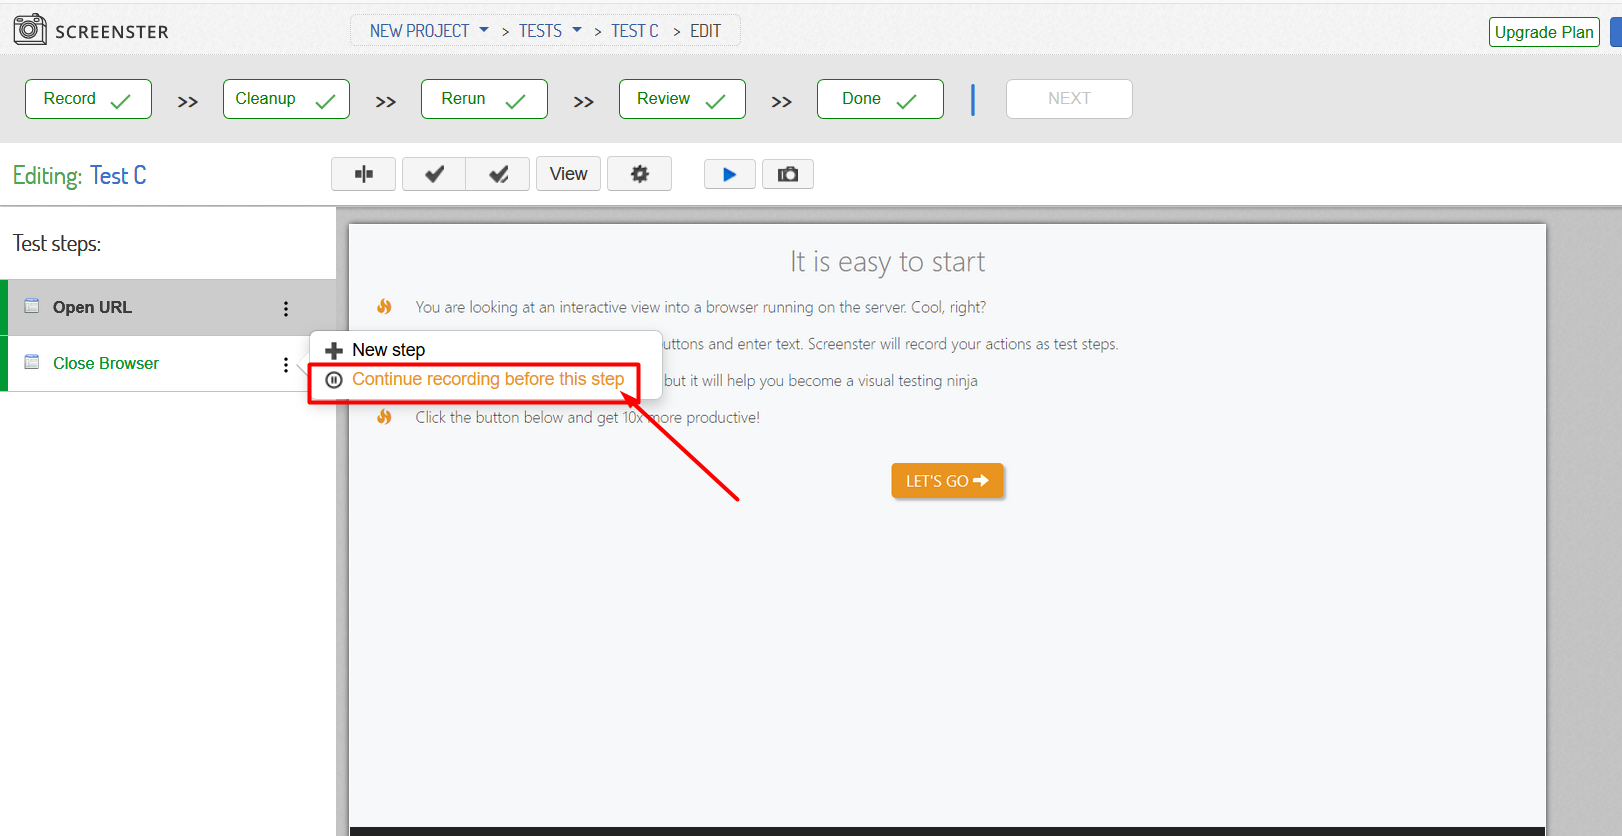
It is often too time-consuming to add steps to your test manually. But there is a quicker way: you can just re-enter the Recording mode in the same test and perform all addition actions you need.
Open your test in Edit mode and hover your mouse over a step. You will see an option named “Continue recording before this step”. Clicking on it will add a breakpoint at this step (this works for any one of them, except the 1st one, Open URL command).
After you have placed the breakpoint, you can click on the Continue Recording button in the menu above.
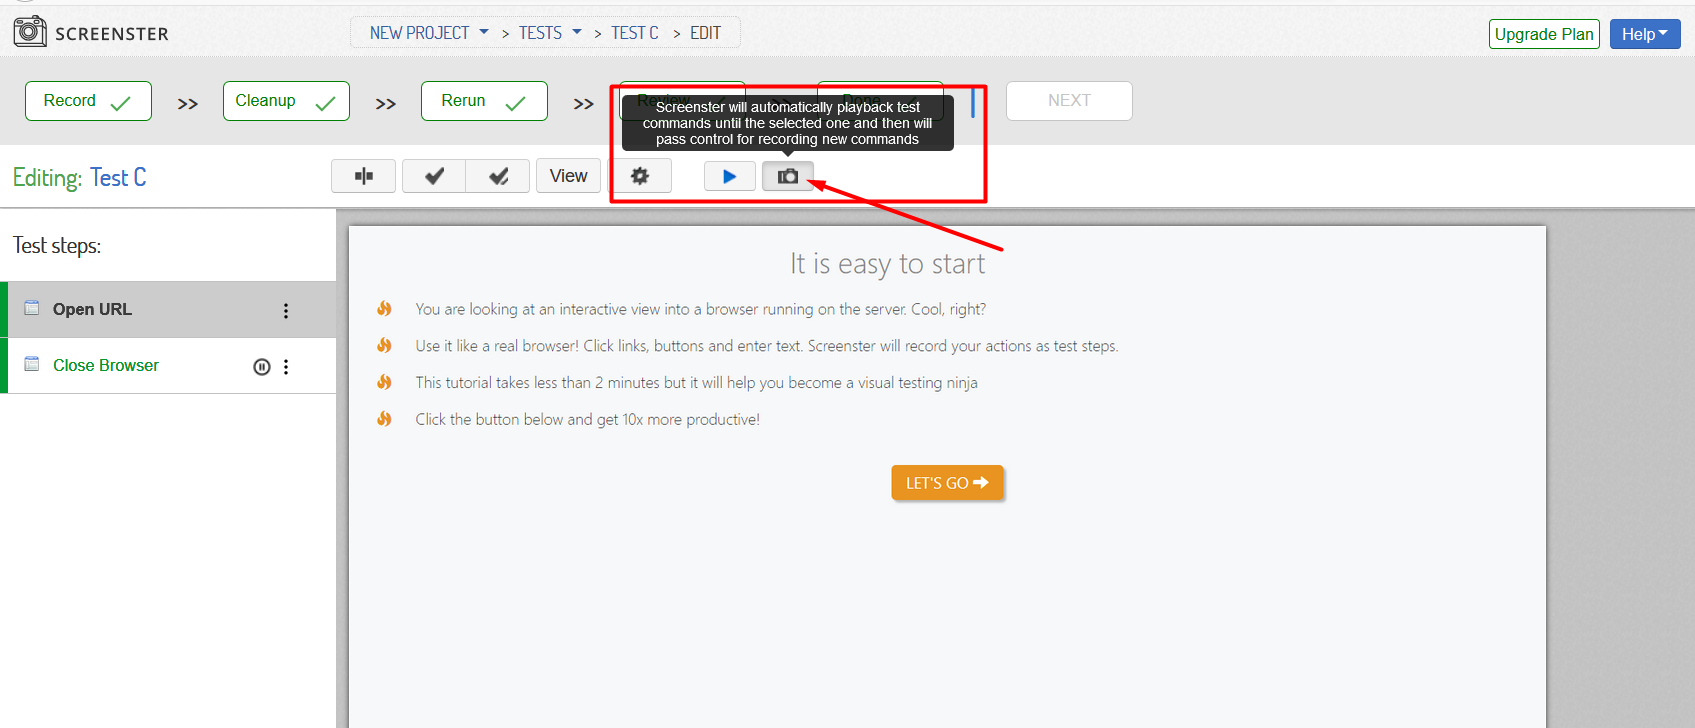
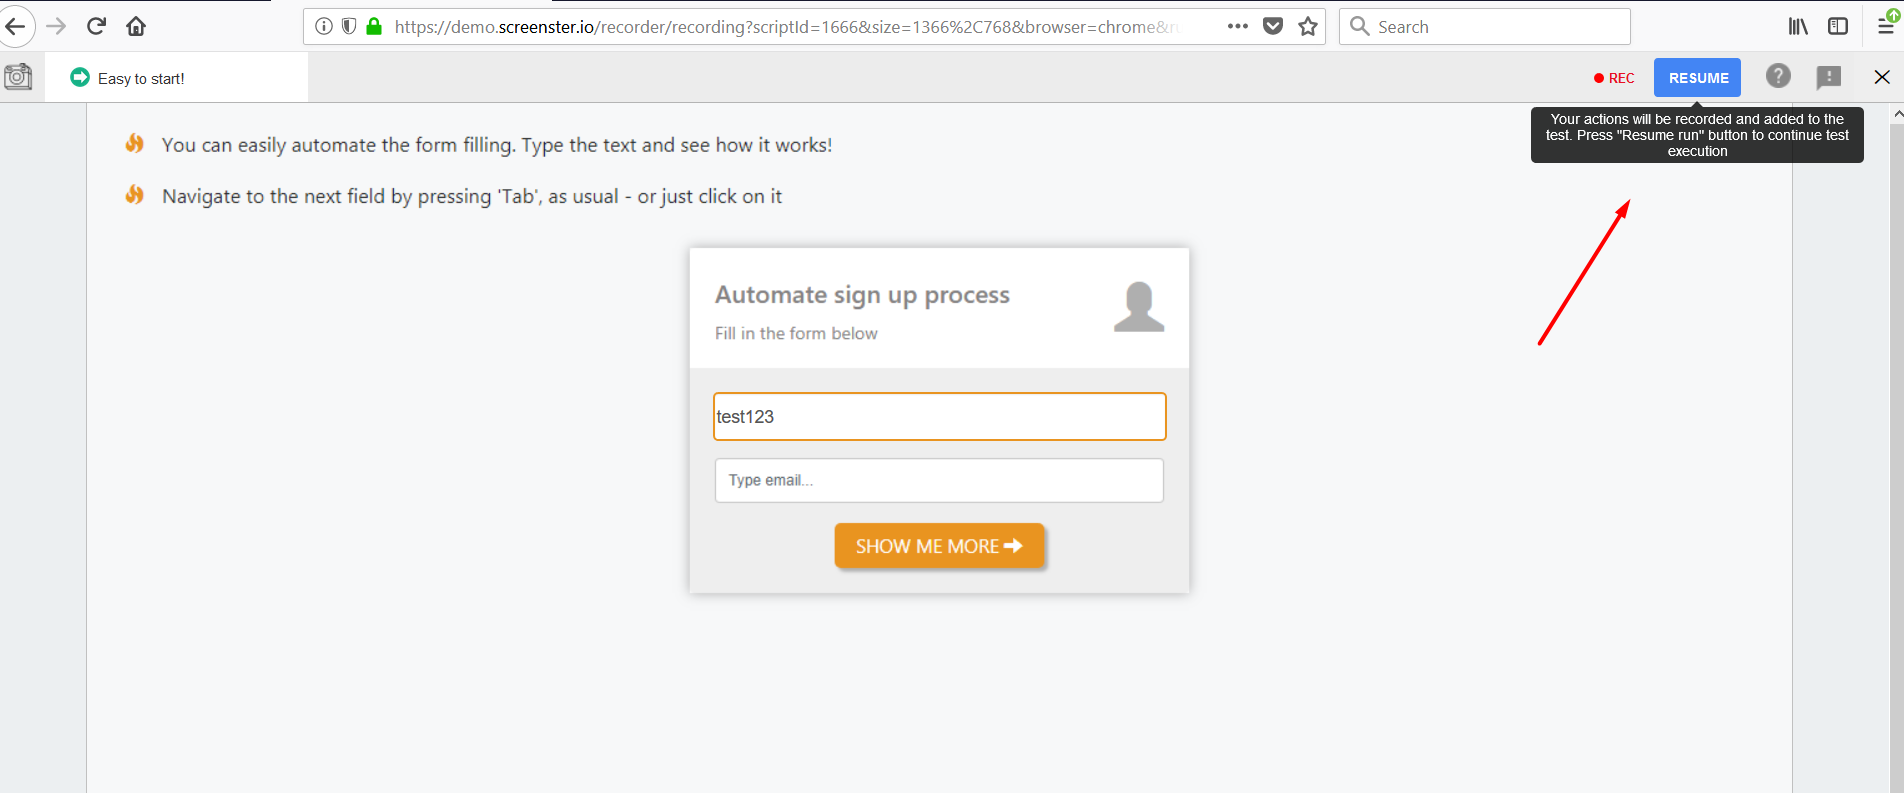
You’ll have to wait until Screenster re-traces the test steps and stops at the breakpoint. Then you can take additional steps. Once done, click on ‘Resume’ to save your progress. Note that currently selected step is also interpreted as a breakpoint. You can have multiple breakpoints in your test.
You can also visit the Release History page to check what’s new and what has been improved in your current Screenster version.